Mastering the Art: How to Draw Biomechanical Tattoo Designs
The allure of biomechanical tattoos lies in their seamless fusion of the organic and the artificial. These designs, inspired by the inner workings of machines and the human body, offer a unique and visually striking form of self-expression. If you’re captivated by this aesthetic and eager to learn how to draw biomechanical tattoo designs, you’ve come to the right place. This comprehensive guide will equip you with the knowledge and techniques needed to create your own intricate and captivating biomech artwork, whether you aspire to design tattoos for yourself or others. We will delve into the fundamental principles, explore advanced techniques, and provide practical tips that will elevate your artistic skills.
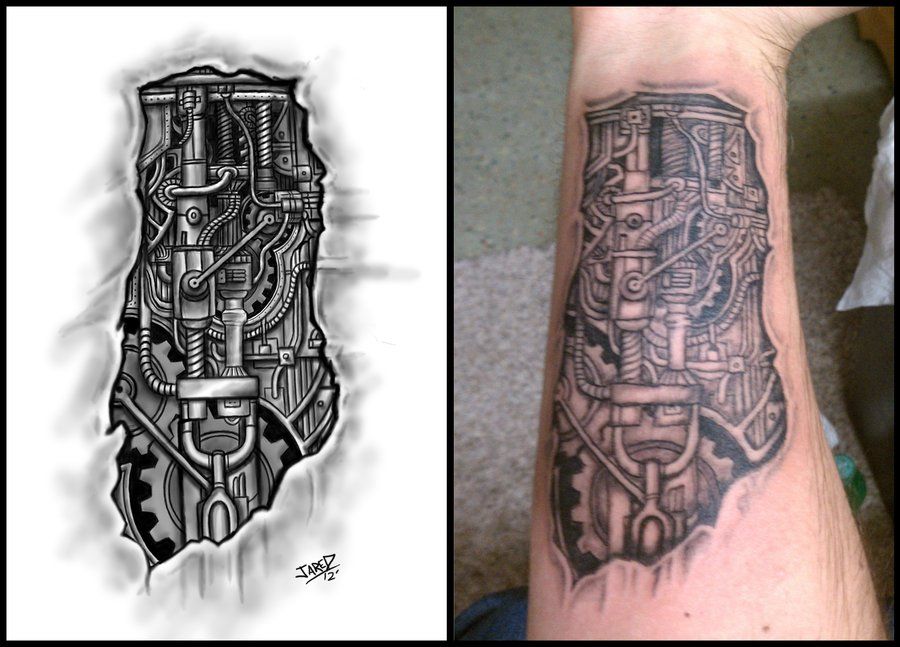
Understanding the Essence of Biomechanical Tattoo Art
Before diving into the technical aspects, it’s crucial to grasp the core essence of biomechanical tattoo art. This style transcends mere imitation; it’s about creating a believable integration of machine parts and organic forms. Think of it as revealing the robotic skeleton beneath the skin, or the biological components intertwined with metallic structures. The key is to create a sense of depth, realism, and movement.
Key Elements of Biomechanical Designs
- Organic Shapes: Incorporate elements reminiscent of muscles, tendons, bones, and other anatomical structures.
- Mechanical Components: Gears, pistons, wires, and other machine parts should be seamlessly integrated with the organic shapes.
- Depth and Dimension: Use shading and perspective to create a three-dimensional effect, making the design appear to emerge from the skin.
- Flow and Movement: The design should follow the natural contours of the body, suggesting movement and fluidity.
- Contrast: Utilize contrasting textures and values to create visual interest and highlight key areas.
Essential Tools and Materials for Biomechanical Tattoo Design
Having the right tools can significantly impact your ability to create stunning biomechanical designs. Here’s a breakdown of essential materials:
- Sketching Pencils: A range of graphite pencils (2H to 6B) for creating light sketches and adding depth with darker shades.
- Erasers: Kneaded erasers for lifting graphite and creating highlights, and a plastic eraser for clean lines.
- Drawing Paper: Smooth, high-quality paper that can withstand multiple layers of graphite and ink.
- Inking Pens: Fine-liners (0.1mm to 0.8mm) for outlining and adding intricate details.
- Markers: Alcohol-based markers for shading and creating smooth gradients. Gray tones are particularly useful for biomechanical designs.
- Tracing Paper: For transferring your design onto the skin or a final piece of paper.
- Reference Images: A collection of anatomical references, mechanical blueprints, and biomechanical tattoo examples for inspiration and accuracy.
Step-by-Step Guide: Drawing Your First Biomechanical Tattoo Design
Let’s walk through the process of creating a simple biomechanical tattoo design. This example will focus on a design for the upper arm, but the principles can be applied to any body part.
1. Conceptualization and Sketching
Start by brainstorming ideas and sketching rough concepts. Consider the placement of the tattoo and how it will interact with the body’s natural contours. Think about the story you want to tell with your design. Will it be a subtle integration of machine and flesh, or a more dramatic transformation?
2. Anatomical Foundation
Before adding any mechanical elements, establish the underlying anatomical structure. Sketch the basic shape of the muscles and bones in the area you’ve chosen. This will provide a realistic foundation for your design. Focus on the flow and movement of the muscles, as this will influence the overall composition.
3. Integrating Mechanical Components
Now comes the fun part: adding the mechanical elements. Start by identifying key areas where you want the mechanical components to emerge from the flesh. Consider using gears, pistons, wires, and other machine parts that complement the anatomical structure. Don’t be afraid to experiment with different arrangements and combinations.
4. Adding Depth and Dimension
Once you’re satisfied with the overall composition, begin adding depth and dimension using shading and perspective. Imagine the light source and use darker shades to create shadows and highlights. This will make the design appear more three-dimensional and realistic. Use cross-hatching, stippling, or smooth gradients to create different textures.
5. Outlining and Detailing
With your sketch complete, it’s time to refine the design with ink. Use a fine-liner to outline the main shapes and add intricate details. Pay attention to line weight, using thicker lines for areas that are closer to the viewer and thinner lines for areas that are further away. Add small details like rivets, screws, and wires to enhance the mechanical realism.
6. Shading and Highlights
Finally, add shading and highlights to bring the design to life. Use markers or pencils to create smooth gradients and subtle tonal variations. Pay attention to the direction of the light source and use highlights to accentuate the three-dimensional form. Consider using different shades of gray to create a sense of depth and complexity.
Advanced Techniques for Biomechanical Tattoo Designs
Once you’ve mastered the basics, you can explore more advanced techniques to elevate your biomechanical tattoo designs. These techniques will add complexity, realism, and visual impact to your artwork.
Organic Integration: Blending Flesh and Machine
The key to a successful biomechanical design is the seamless integration of organic and mechanical elements. This requires a deep understanding of anatomy and mechanics. Study the way muscles and tendons connect and how machines function. Use this knowledge to create a believable fusion of flesh and metal. Consider adding details like veins, scars, and exposed bone to enhance the organic realism.
Textural Variety: Creating Visual Interest
Varying the textures in your design can create visual interest and enhance the realism. Use different shading techniques to simulate the textures of metal, flesh, and bone. Consider adding details like rust, scratches, and dents to the mechanical components. Use stippling or cross-hatching to create a rough, organic texture on the flesh. Experiment with different textures to find what works best for your design.
Dynamic Composition: Creating a Sense of Movement
A dynamic composition can create a sense of movement and energy in your biomechanical tattoo design. Consider the flow of the muscles and the way they interact with the mechanical components. Use curved lines and flowing shapes to create a sense of dynamism. Add details like wires and cables that appear to be moving or flexing. Experiment with different compositions to find what best conveys the feeling of movement.
Color Theory and Application
While many biomechanical tattoos are done in black and gray, incorporating color can add another layer of depth and visual impact. Consider using metallic colors like silver, gold, and bronze to enhance the mechanical realism. Use contrasting colors to highlight key areas and create visual interest. Experiment with different color palettes to find what works best for your design. Understanding color theory is essential for creating a harmonious and visually appealing design.
The Role of Digital Tools in Biomechanical Tattoo Design
While traditional drawing techniques are essential, digital tools can greatly enhance the biomechanical tattoo design process. Software like Procreate, Adobe Photoshop, and Autodesk Sketchbook offer a wide range of features that can streamline your workflow and expand your creative possibilities.
Digital Sketching and Refinement
Digital sketching allows you to quickly experiment with different ideas and refine your designs without the need for erasers or fresh sheets of paper. You can easily adjust the size, shape, and position of elements, making it easier to create a balanced and harmonious composition. Digital software also offers features like layers, which allow you to work on different elements of the design independently.
Digital Shading and Highlighting
Digital shading and highlighting tools allow you to create smooth gradients and subtle tonal variations with ease. You can use brushes, gradients, and blending modes to create a realistic three-dimensional effect. Digital software also offers features like color palettes and color pickers, which can help you create a cohesive and visually appealing color scheme.
Creating Stencils for Tattoo Artists
Digital software can also be used to create stencils for tattoo artists. By creating a high-resolution image of your design, you can easily print it out and transfer it onto the skin. Digital stencils are more accurate and precise than hand-drawn stencils, ensuring that the tattoo artist can accurately reproduce your design. Some software even allows you to create layered stencils, which can help the tattoo artist create complex shading and highlighting effects.
Inspiration and Resources for Biomechanical Tattoo Artists
Finding inspiration and resources is crucial for continuous growth as a biomechanical tattoo artist. Here are some valuable avenues to explore:
- Online Art Communities: Platforms like DeviantArt, ArtStation, and Behance showcase a wealth of biomechanical art from artists around the world.
- Tattoo Conventions: Attending tattoo conventions provides opportunities to see biomechanical tattoos in person, connect with artists, and learn new techniques.
- Anatomical and Mechanical References: Studying anatomy textbooks, engineering diagrams, and mechanical blueprints is essential for creating realistic and believable designs.
- Biomechanical Artists: Following established biomechanical tattoo artists on social media and studying their work can provide valuable insights and inspiration.
Biomechanical Aesthetics: A Fusion of Art and Engineering
Biomechanical tattoo designs are more than just drawings; they’re a testament to the fusion of artistic vision and engineering principles. By understanding the core elements, mastering the techniques, and continuously seeking inspiration, you can create stunning biomechanical artwork that resonates with both the eye and the mind. The journey to mastering this art form requires dedication and practice, but the reward is the ability to create truly unique and captivating designs that push the boundaries of tattoo art.
Elevate Your Tattoo Art
Learning how to draw biomechanical tattoo designs opens up a world of creative possibilities. By embracing the blend of organic and mechanical elements, you can craft tattoos that are not only visually striking but also deeply meaningful. Share your biomechanical tattoo design journey with fellow enthusiasts and explore our other guides to further enhance your artistic skills. The world of tattoo art awaits your unique vision.
