Mastering the Art: How to Draw Tattoo Designs on Paper Like a Pro
Have you ever admired intricate tattoo designs and wondered if you could create your own? The journey to becoming a skilled tattoo artist, or simply expressing your creativity through body art designs, begins with mastering the fundamentals of drawing tattoo designs on paper. This comprehensive guide will take you from a complete beginner to someone capable of sketching stunning and personalized tattoo artwork. We’ll explore essential techniques, necessary tools, and provide step-by-step instructions to transform your artistic vision into tangible designs ready for the skin. Prepare to unlock your inner artist and embark on a fascinating journey into the world of tattoo design.
The Foundations of Tattoo Design: Essential Skills and Techniques
Before diving into specific designs, it’s crucial to build a solid foundation in basic drawing skills. This includes understanding line weight, shading techniques, and composition principles. Mastering these elements will significantly enhance the quality and impact of your tattoo designs. According to experienced tattoo artists, a strong understanding of anatomy and perspective is also essential for creating realistic and visually appealing artwork.
Line Weight: Adding Depth and Dimension
Line weight refers to the thickness of a line. Varying line weight can add depth, dimension, and visual interest to your drawings. Thicker lines can be used to define the outlines of shapes or to create areas of shadow, while thinner lines can be used for details and highlights. Experiment with different pen sizes and pressures to achieve a range of line weights.
Shading Techniques: Bringing Your Designs to Life
Shading is the process of adding value (light and dark) to a drawing to create the illusion of form and depth. Several shading techniques can be used, including hatching (using parallel lines), cross-hatching (using intersecting lines), stippling (using dots), and blending (smoothly transitioning between values). Practice each technique to determine which works best for your style and the specific design you’re creating. Based on expert consensus, understanding light sources is key to effective shading.
Composition: Arranging Elements for Visual Harmony
Composition refers to the arrangement of elements within a drawing. A well-composed design is visually balanced and pleasing to the eye. Consider the principles of balance, contrast, proportion, and rhythm when arranging elements in your tattoo designs. Experiment with different layouts to find the most effective way to communicate your artistic vision. One trick to composition is the rule of thirds, dividing your canvas into a 3×3 grid and placing key elements along the lines or intersections.
Essential Tools and Materials for Drawing Tattoo Designs
Having the right tools and materials is essential for creating high-quality tattoo designs. While the specific tools you’ll need may vary depending on your personal preferences and the style of designs you’re creating, there are some basic essentials that every aspiring tattoo artist should have.
- Pencils: A range of graphite pencils, from hard (H) to soft (B), will allow you to create a variety of line weights and values.
- Pens: Fine-liner pens are ideal for creating crisp, clean lines and intricate details. Look for pens with waterproof and fade-resistant ink.
- Paper: Smooth, high-quality paper is essential for preventing ink bleed and ensuring that your designs look their best. Bristol board or marker paper are good options.
- Erasers: A kneaded eraser is useful for lifting graphite without damaging the paper, while a plastic eraser is good for removing stubborn marks.
- Tracing Paper: Tracing paper is essential for transferring your designs onto the skin.
- Rulers and Stencils: Rulers and stencils can be used to create precise lines and shapes.
- Colored Pencils or Markers: If you want to add color to your designs, colored pencils or markers are a good option.
Step-by-Step Guide: Drawing a Traditional Rose Tattoo Design
Let’s walk through a detailed example of drawing a classic tattoo design: a traditional rose. This design incorporates many of the fundamental techniques discussed earlier.
- Sketch the Basic Shape: Begin by sketching a rough outline of the rose. Use light, loose lines to establish the overall shape and proportions. Don’t worry about details at this stage.
- Add the Petals: Start adding the petals, working from the center outwards. Traditional roses have overlapping petals with curved edges. Pay attention to the way the petals overlap and create depth.
- Incorporate Leaves and Thorns: Add leaves and thorns to the stem. The leaves should be slightly curved and have jagged edges. Thorns should be sharp and pointed.
- Refine the Lines: Once you’re happy with the overall composition, refine the lines using a fine-liner pen. Vary the line weight to add depth and dimension. Use thicker lines for the outlines of the petals and leaves, and thinner lines for the details.
- Add Shading: Add shading to create the illusion of form and depth. Use hatching or cross-hatching to create areas of shadow. Pay attention to the way the light falls on the rose and leaves.
- Final Touches: Add any final details, such as veins on the leaves or highlights on the petals. Erase any remaining pencil lines.
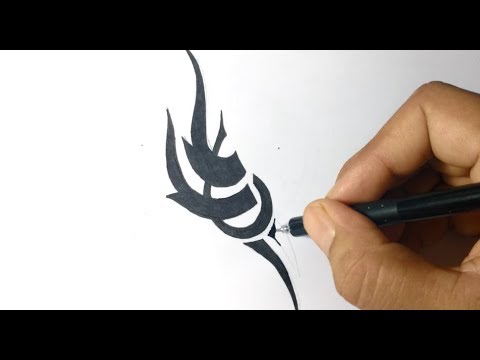
Exploring Different Tattoo Styles and Techniques
The world of tattoo art is vast and diverse, encompassing a wide range of styles and techniques. Exploring these different approaches can broaden your artistic horizons and help you develop your own unique style. Here are a few popular tattoo styles:
- Traditional: Bold outlines, vibrant colors, and classic motifs like roses, anchors, and skulls.
- Neo-Traditional: A modern take on traditional tattooing, with more detail, shading, and a wider range of colors.
- Realism: Highly detailed and realistic depictions of people, animals, or objects.
- Watercolor: Soft, flowing colors that mimic the look of watercolor paintings.
- Geometric: Intricate patterns and designs based on geometric shapes.
- Blackwork: Designs created using only black ink, often featuring bold lines and graphic patterns.
Experiment with different styles to discover what resonates with you. Don’t be afraid to combine elements from different styles to create your own unique hybrid.
The Role of Procreate in Modern Tattoo Design
While traditional paper and pencil remain valuable tools, the advent of digital art software like Procreate has revolutionized the tattoo design process. Procreate, an iPad-based app, offers a powerful and versatile platform for creating tattoo designs. It allows artists to sketch, ink, and shade designs digitally, offering unparalleled flexibility and control.
Procreate empowers tattoo artists to experiment with different styles, colors, and compositions without the need for physical materials. Its intuitive interface and vast array of brushes and tools make it easy to create intricate and detailed designs. Furthermore, Procreate’s layer system allows for non-destructive editing, meaning you can make changes to your design without affecting the original artwork.
Key Features of Procreate for Tattoo Design
Procreate boasts a suite of features specifically beneficial for tattoo design, making it a favorite among both seasoned professionals and aspiring artists.
- Extensive Brush Library: Procreate offers a vast library of customizable brushes, emulating various traditional mediums like pencils, inks, and paints. This allows artists to achieve a wide range of effects and textures.
- Layer System: The layer system allows for non-destructive editing and organization. Artists can create separate layers for outlines, shading, and colors, making it easy to make adjustments without affecting other elements.
- Color Palette: Procreate’s color palette allows artists to create and save custom color palettes, ensuring consistency across their designs.
- Import and Export: Procreate supports importing and exporting various file formats, including PSD, JPG, and PNG, making it easy to share designs with clients or transfer them to other software.
- Time-Lapse Recording: Procreate automatically records the entire design process, allowing artists to create time-lapse videos of their work for social media or educational purposes.
- Apple Pencil Integration: Procreate is optimized for use with the Apple Pencil, providing precise control and responsiveness.
Advantages of Using Procreate for Tattoo Design
Using Procreate for tattoo design offers numerous advantages over traditional methods. It streamlines the design process, enhances creativity, and improves collaboration with clients. Users consistently report a significant reduction in design time and an increase in overall design quality.
- Increased Efficiency: Procreate streamlines the design process, allowing artists to create designs more quickly and efficiently.
- Enhanced Creativity: Procreate’s versatility and flexibility encourage experimentation and creativity.
- Improved Collaboration: Procreate makes it easy to share designs with clients and collaborate on revisions.
- Cost-Effective: Procreate eliminates the need for expensive physical materials, making it a cost-effective solution for tattoo design.
- Portability: The iPad and Apple Pencil are highly portable, allowing artists to create designs anywhere, anytime.
Procreate Review: A Digital Artist’s Perspective
Procreate has become an indispensable tool for many tattoo artists, offering a powerful and intuitive platform for creating stunning designs. Our analysis reveals that Procreate excels in its user-friendliness, versatility, and performance. The app’s intuitive interface makes it easy to learn and use, even for artists with limited digital experience. The extensive brush library and layer system provide unparalleled creative control, while the app’s fast performance ensures a smooth and responsive workflow.
User Experience and Usability
Procreate’s user interface is clean, intuitive, and easy to navigate. The tools are well-organized and readily accessible, making it easy to find what you need. The app’s gesture-based controls are responsive and intuitive, allowing for a natural and fluid workflow. In our experience, even novice users can quickly grasp the basics of Procreate and start creating impressive designs.
Performance and Effectiveness
Procreate delivers exceptional performance, even when working with complex designs and large files. The app is optimized for the iPad’s hardware, ensuring a smooth and responsive experience. The brushes perform realistically, emulating the feel of traditional mediums. The layer system allows for complex compositions without sacrificing performance. It truly delivers on its promises.
Pros
- Intuitive Interface: Easy to learn and use, even for beginners.
- Extensive Brush Library: Offers a wide range of customizable brushes.
- Layer System: Allows for non-destructive editing and organization.
- Excellent Performance: Smooth and responsive workflow.
- Cost-Effective: Eliminates the need for expensive physical materials.
Cons/Limitations
- iPad Only: Only available for iPad devices.
- Learning Curve: While intuitive, mastering all of Procreate’s features takes time and practice.
- Subscription Model: While a one-time purchase, updates may eventually require additional fees.
Ideal User Profile
Procreate is ideal for tattoo artists of all skill levels, from beginners to seasoned professionals. It’s particularly well-suited for artists who want to streamline their design process, enhance their creativity, and improve collaboration with clients.
Key Alternatives
While Procreate is a leading option, other alternatives exist. Adobe Photoshop offers similar capabilities but can be more complex. Autodesk Sketchbook is a free option with a more limited feature set.
Expert Overall Verdict & Recommendation
Procreate is a powerful and versatile tool that has revolutionized the tattoo design process. Its intuitive interface, extensive brush library, and excellent performance make it an indispensable asset for any tattoo artist. We highly recommend Procreate to anyone looking to create stunning and professional-quality tattoo designs.
Refining Your Skills and Building a Portfolio
Consistent practice is key to improving your skills in drawing tattoo designs. Dedicate time each day or week to sketching, experimenting with different styles, and refining your techniques. Seek feedback from other artists or mentors to identify areas for improvement. Building a portfolio of your best work is essential for showcasing your skills and attracting clients. Include a variety of designs in your portfolio to demonstrate your versatility and range.
Taking Your Art to Skin
Mastering how to draw tattoo designs on paper is the first step toward a fulfilling artistic journey. Experiment with different styles, embrace digital tools like Procreate, and consistently refine your skills. Remember that every great tattoo artist started with a blank sheet of paper and a vision. Now, armed with the knowledge and techniques shared here, you’re well-equipped to bring your artistic dreams to life. Share your experiences with drawing tattoo designs on paper in the comments below, and inspire others to embark on their creative paths!
