Mastering the Art: How to Draw Tattoo Designs on Paper Like a Pro
So, you’re captivated by the world of ink and skin art and want to learn how to draw tattoo designs on paper? You’ve come to the right place. This comprehensive guide will take you from beginner sketches to creating professional-looking tattoo designs ready for the needle. We’ll explore the essential techniques, tools, and artistic principles involved in bringing your tattoo visions to life on paper. This isn’t just another tutorial; it’s a deep dive into the art form, providing you with the knowledge and skills to confidently design tattoos that are both visually stunning and technically sound. Whether you’re an aspiring tattoo artist or simply want to explore your creativity, this guide provides the foundation you need to succeed.
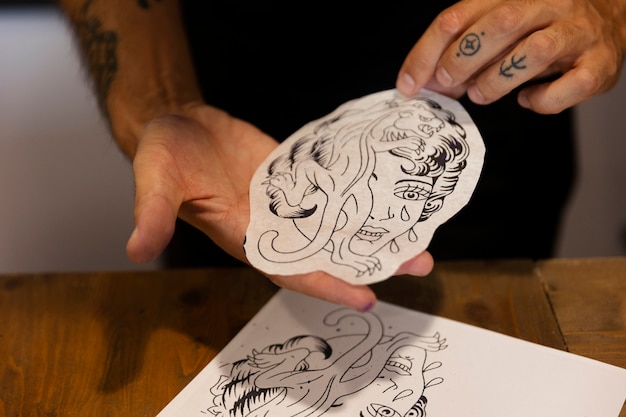
Unveiling the World of Tattoo Design on Paper
Drawing tattoo designs on paper is more than just sketching; it’s a crucial step in the tattoo creation process. It allows artists to experiment with different styles, refine their ideas, and create a stencil that can be accurately transferred to the skin. In essence, it’s the blueprint for a lasting piece of art. Mastering this skill involves understanding fundamental art principles, tattoo design aesthetics, and the unique considerations of applying art to the human body. This is about translating inspiration into tangible, workable designs that respect both artistic expression and the realities of tattooing.
The principles of design, such as balance, contrast, and unity, are paramount. A good tattoo design must be visually appealing and flow naturally with the body’s contours. Understanding anatomy is also crucial. A design that looks great on paper might not translate well to the skin if it doesn’t consider muscle movement, bone structure, and skin elasticity. This is where the expertise comes in – years of practice refining your eye for translating a concept to the canvas that is the human form.
Drawing tattoo designs also allows you to fully realize your creative vision without the immediate commitment or pain involved with tattooing. It’s a low-stakes environment to learn and refine your skills, experiment with different styles, and develop your unique artistic voice. This practice can be invaluable for aspiring tattoo artists, providing them with a portfolio of designs to showcase their abilities and attract clients.
The Essential Tools for Tattoo Design on Paper
While artistic skill is paramount, having the right tools can significantly enhance your ability to create compelling tattoo designs. Here’s a breakdown of the essential tools you’ll need:
- Pencils: A range of pencils, from hard (4H) to soft (6B), is essential for sketching, outlining, and shading. Harder pencils are ideal for light sketches and guidelines, while softer pencils create darker lines and shadows.
- Erasers: A good quality eraser, such as a kneaded eraser or a white plastic eraser, is crucial for correcting mistakes and creating highlights.
- Paper: Smooth, heavyweight paper is ideal for drawing tattoo designs. It provides a good surface for pencils and prevents ink from bleeding. Bristol board is a popular choice among tattoo artists.
- Pens: Fine-liner pens with waterproof ink are essential for outlining and adding details to your designs. A range of tip sizes will allow you to create varying line weights.
- Markers: Alcohol-based markers, such as Copic or Prismacolor markers, are excellent for adding color and shading to your designs. They blend smoothly and provide vibrant colors.
- Tracing Paper: Tracing paper is used to transfer your final design onto stencil paper.
- Stencil Paper: Stencil paper is a special type of paper used to create stencils for tattooing. It consists of a layer of transfer paper, a carbon layer, and a backing sheet.
- Light Box (Optional): A light box can be helpful for tracing and refining your designs, especially when working with multiple layers.
- Rulers and Compasses: These tools are essential for creating precise lines, shapes, and geometric patterns.
Step-by-Step Guide: Creating Tattoo Designs on Paper
Now, let’s dive into the step-by-step process of creating tattoo designs on paper:
1. Conceptualization and Inspiration
Every great tattoo design starts with an idea. Gather inspiration from various sources, such as nature, mythology, art history, or personal experiences. Sketch out your initial ideas and experiment with different compositions and styles. Consider the placement of the tattoo on the body and how the design will flow with the body’s contours.
2. Sketching and Outlining
Using a light pencil, sketch out the basic shapes and lines of your design. Don’t worry about perfection at this stage; focus on capturing the overall composition and proportions. Once you’re satisfied with the sketch, refine the lines and add details using a darker pencil or a fine-liner pen. Consider the weight and thickness of the lines to create depth and visual interest.
3. Shading and Detailing
Shading is crucial for adding depth and dimension to your tattoo design. Use different shading techniques, such as hatching, cross-hatching, or stippling, to create shadows and highlights. Pay attention to the light source and how it affects the form of your design. Add details, such as textures, patterns, and small embellishments, to enhance the visual appeal of your design.
4. Color Application (Optional)
If you plan to add color to your tattoo design, use alcohol-based markers or colored pencils. Choose colors that complement each other and create the desired mood or effect. Consider the color palette and how it will translate to the skin. Remember that some colors may fade or change over time, so it’s essential to choose durable and vibrant pigments.
5. Transferring the Design to Stencil Paper
Once you’re satisfied with your final design, it’s time to transfer it to stencil paper. Place a sheet of tracing paper over your design and trace the outline and key details. Then, place the tracing paper over the stencil paper and trace the design again, pressing firmly to transfer the carbon onto the stencil paper. Carefully remove the tracing paper and backing sheet, leaving the stencil ready to be applied to the skin.
Mastering Different Tattoo Styles on Paper
The world of tattoo art is incredibly diverse, encompassing a wide range of styles, each with its unique characteristics and techniques. Here are a few popular tattoo styles and how to approach drawing them on paper:
- Traditional Tattoo: Characterized by bold outlines, simple shading, and limited color palettes. Focus on creating clean, crisp lines and using traditional motifs, such as anchors, roses, and eagles.
- Neo-Traditional Tattoo: A modern take on traditional tattooing, featuring bolder lines, more complex shading, and a wider range of colors. Incorporate more detailed imagery and dynamic compositions.
- Realism Tattoo: Aims to replicate real-life images with incredible detail and accuracy. Requires a strong understanding of anatomy, perspective, and shading. Use reference photos to guide your drawing and pay attention to subtle details.
- Watercolor Tattoo: Mimics the look of watercolor paintings with soft, blended colors and fluid lines. Use light, transparent markers or colored pencils to create a watercolor effect.
- Geometric Tattoo: Features precise geometric shapes and patterns. Use rulers, compasses, and other drafting tools to create accurate and symmetrical designs.
Common Mistakes to Avoid When Drawing Tattoo Designs
Even experienced artists can make mistakes when drawing tattoo designs. Here are some common pitfalls to avoid:
- Ignoring Anatomy: A tattoo design that doesn’t consider the body’s anatomy will look awkward and unnatural. Study anatomy and understand how the muscles, bones, and skin move and interact.
- Poor Line Work: Uneven or shaky lines will detract from the overall quality of your design. Practice your line work and use a steady hand.
- Overly Complex Designs: A design that is too complex or cluttered will be difficult to tattoo and may not heal well. Simplify your design and focus on the essential elements.
- Inadequate Shading: Poor shading can make a design look flat and lifeless. Pay attention to the light source and use different shading techniques to create depth and dimension.
- Ignoring Negative Space: Negative space is the empty space around and within your design. Use negative space effectively to create balance and visual interest.
The Role of Digital Tools in Modern Tattoo Design
While traditional drawing techniques are essential, digital tools can significantly enhance your tattoo design workflow. Software like Procreate, Adobe Photoshop, and Adobe Illustrator offer a wide range of features that can streamline the design process and allow you to create complex and detailed designs. These tools allow you to easily experiment with different colors, shading techniques, and compositions. They also make it easier to create stencils and transfer designs to stencil paper.
Furthermore, digital platforms facilitate collaboration with clients. Sharing designs digitally, receiving feedback, and making revisions becomes significantly more efficient. This collaborative approach ensures the final tattoo design aligns perfectly with the client’s vision, enhancing overall satisfaction.
However, it’s important to remember that digital tools are just tools. They can enhance your skills, but they cannot replace the fundamental knowledge and artistic principles that underpin good tattoo design. It’s essential to master traditional drawing techniques before diving into digital design.
Advantages of Mastering Tattoo Design on Paper
While digital tools offer convenience, mastering the art of designing tattoos on paper offers several distinct advantages. These advantages contribute to a deeper understanding of the art form and enhance your overall skills as a tattoo artist.
- Enhanced Creativity: Drawing on paper allows for a more organic and intuitive creative process. You’re not limited by the constraints of software or hardware, allowing your imagination to flow freely.
- Improved Hand-Eye Coordination: Practicing traditional drawing techniques improves your hand-eye coordination, which is essential for tattooing.
- Deeper Understanding of Anatomy: Drawing anatomical studies on paper helps you develop a deeper understanding of the body’s form and structure, which is crucial for creating realistic and well-placed tattoos.
- Stronger Foundation in Art Principles: Mastering traditional drawing techniques provides a solid foundation in art principles, such as composition, perspective, and shading.
- A Unique Artistic Style: Developing your own unique style on paper can set you apart from other tattoo artists.
Reviewing the Procreate App for Tattoo Design
Procreate has quickly become an industry-standard application for digital artists, including tattoo designers. Its intuitive interface, powerful features, and affordability make it an attractive option for both beginners and experienced artists. Here’s a detailed review of Procreate’s features and benefits for tattoo design:
Key Features:
- Intuitive Interface: Procreate’s user-friendly interface makes it easy to learn and use, even for beginners.
- Powerful Brushes: Procreate offers a wide range of customizable brushes that mimic traditional drawing tools, such as pencils, pens, and markers.
- Layering System: Procreate’s layering system allows you to create complex designs with multiple layers of detail.
- Color Palette: Procreate’s color palette allows you to easily choose and manage colors for your designs.
- Import/Export Options: Procreate allows you to import and export your designs in various formats, including JPEG, PNG, and PSD.
- Time-Lapse Recording: Procreate automatically records your drawing process, allowing you to create time-lapse videos of your artwork.
Pros:
- Affordable: Procreate is a one-time purchase, making it a cost-effective option compared to other digital art software.
- User-Friendly: Procreate’s intuitive interface makes it easy to learn and use.
- Powerful Features: Procreate offers a wide range of features that can enhance your tattoo design workflow.
- Portable: Procreate is available on iPad, allowing you to create designs on the go.
- Large Community: Procreate has a large and active community of users who share tips, tutorials, and resources.
Cons:
- Limited to iOS: Procreate is only available on iOS devices, which may be a limitation for some users.
- No Vector Graphics: Procreate is primarily a raster-based program, which means it’s not ideal for creating vector graphics.
- Learning Curve: While Procreate is relatively easy to learn, mastering all of its features takes time and practice.
Ideal User Profile:
Procreate is best suited for tattoo artists who want to create digital designs on the go, experiment with different styles, and collaborate with clients remotely.
Key Alternatives:
Adobe Photoshop and Adobe Illustrator are two popular alternatives to Procreate. Photoshop is a powerful image editing software that offers a wide range of features for creating and manipulating images. Illustrator is a vector-based program that is ideal for creating logos, illustrations, and other graphics that need to be scaled without losing quality.
Expert Overall Verdict & Recommendation:
Procreate is an excellent tool for tattoo design, offering a user-friendly interface, powerful features, and affordability. While it has some limitations, such as being limited to iOS devices and not supporting vector graphics, its strengths outweigh its weaknesses. We highly recommend Procreate for tattoo artists who want to enhance their digital design workflow.
Refining Your Skills and Building a Portfolio
The journey of mastering tattoo design on paper is ongoing. Continuous practice, experimentation, and learning are essential for refining your skills and developing your unique artistic voice. Here are some tips for honing your craft and building a compelling portfolio:
- Practice Regularly: Dedicate time each day or week to practice drawing tattoo designs. The more you practice, the better you’ll become.
- Experiment with Different Styles: Explore different tattoo styles and techniques to broaden your artistic horizons.
- Seek Feedback: Share your designs with other artists and ask for constructive criticism.
- Attend Workshops and Seminars: Attend workshops and seminars to learn from experienced tattoo artists.
- Build a Portfolio: Create a portfolio of your best tattoo designs to showcase your skills and attract clients.
What’s Next for Your Tattoo Design Journey?
Mastering how to draw tattoo designs on paper is a rewarding journey that combines artistic skill, technical knowledge, and a deep understanding of the human form. By following the steps outlined in this guide, practicing regularly, and continuously seeking to improve, you can develop the skills and confidence to create stunning tattoo designs that will last a lifetime. Remember, the key is to embrace the process, experiment with different styles, and never stop learning. Now it’s time to pick up your pencils, fire up your tablet, and bring your tattoo visions to life. Share your creations and experiences with us in the comments below!
